Creating and Displaying Reports in a WPF Application with .NET 8 and Entity Framework
Creating desktop applications using WPF is an excellent choice for its rich features and flexibility. However, one common requirement is to provide users with the ability to generate, view, and export reports. While there are many paid solutions for reporting in the .NET environment, finding a free, community-supported alternative can be challenging.
In this post, I’ll introduce a solution for creating and displaying reports using .NET 8, Entity Framework, and WPF, leveraging the free and open-source version of FastReport.
Step 1: Setting Up FastReport Open Source
FastReport is a well-known reporting tool in the .NET ecosystem, and its open-source version, FastReport Community, provides many of the features of the paid version with some limitations. To get started, follow these steps:
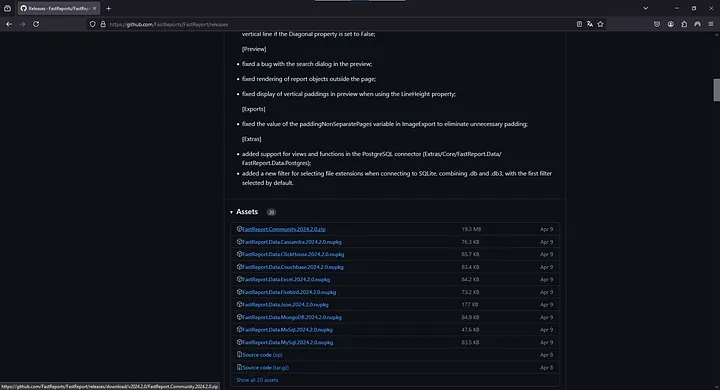
- Download FastReport Community: Visit the FastReport GitHub repository and download the latest release from the releases section.
- Extract and Use the Designer: The downloaded package includes several tools. The one we need is the Designer, which allows us to create and edit reports.
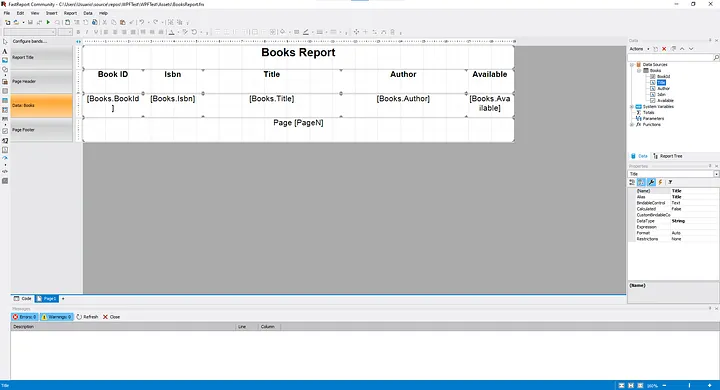
Step 2: Creating a Report
The goal is to create a report that can be dynamically populated in our application. Here’s a streamlined way to achieve this without directly connecting to a database:
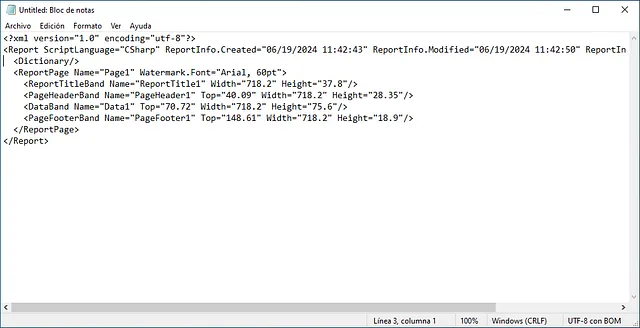
- Open the Designer: Create a new blank report and save it as a
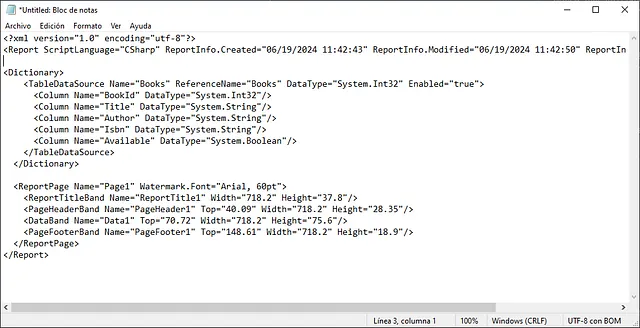
.frxfile. - Edit the
.frxFile: Open the.frxfile in a text editor. Add asection to define the properties of the entity you will use in the report. Make sure to specify the correct reference names and data types (e.g., System.Int32), and setEnabledtotrue. - Format the Report: Return to the Designer, open the modified
.frxfile, and format your report using the defined properties as references. This allows you to design the report according to your needs.
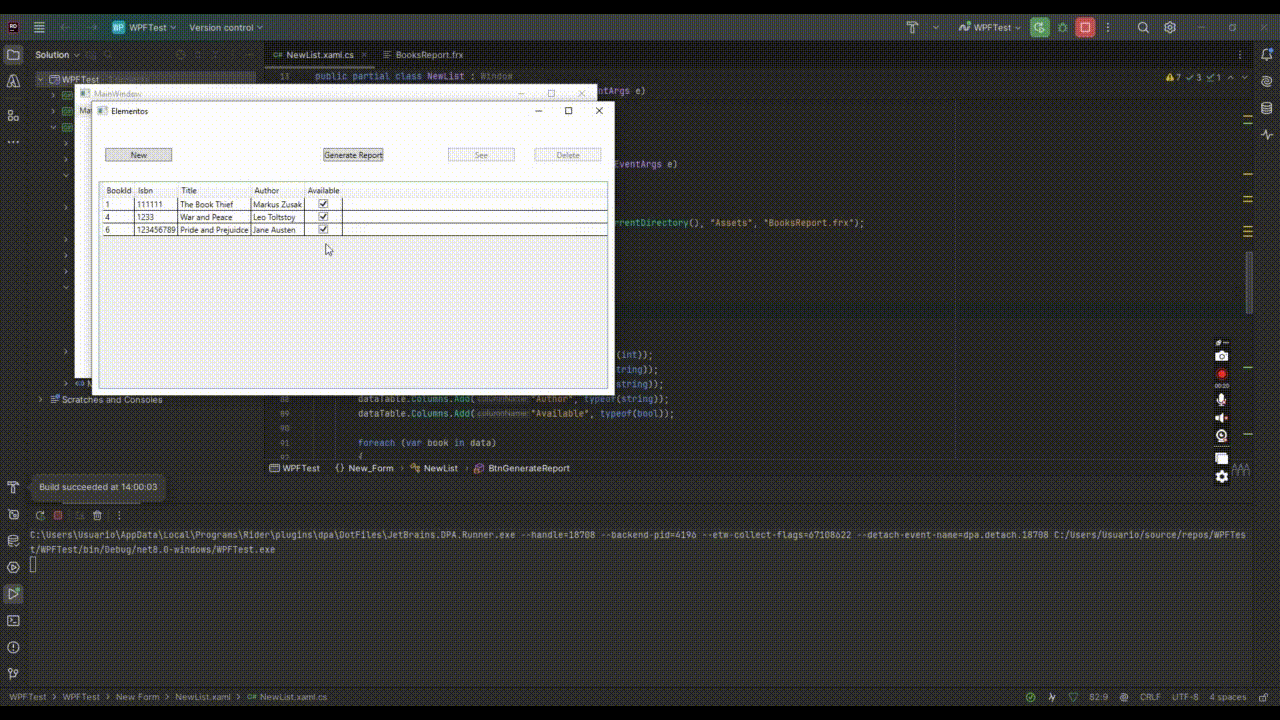
Step 3: Integrating the Report into Your WPF Application
To display the report in your WPF application, follow these steps:
Install Necessary Packages:

- Open the NuGet Package Manager in your WPF project.
- Install the
FastReport.OpenSource package. This package provides the core functionality needed to process reports. - Install the
FastReport.OpenSource.Export.PdfSimplepackage. This package adds PDF export functionality, allowing you to generate PDF files from your reports.
Create and Export the Report:

- Load the
.frxreport file in your WPF application. - Populate the report with data. If you are using Entity Framework, retrieve the data from your database and bind it to the report.
- Prepare the report for export. This involves processing the report to apply the data bindings and formatting.
Save and Display the Report:
- Export the report to a PDF file. Save this PDF file in a temporary directory.
- Open the PDF file using the default PDF viewer installed on the user’s system. This approach leverages the PDF viewer’s built-in functionalities such as save, print, zoom, and navigate, providing a seamless experience for the user.
- By exporting the report to a PDF file and using the system’s default PDF viewer, you ensure that users can easily interact with the report without requiring additional components or plugins. This method is particularly useful for providing basic report viewing capabilities without the need for an integrated report viewer component.
Simple approach example:
using System.Data;
using System.Diagnostics;
using System.IO;
using System.Windows;
using ClassLibrary.Context;
using ClassLibrary.Entities;
using Controller.Book;
using FastReport;
using FastReport.Export.PdfSimple;

private void BtnGenerateReport(object sender, RoutedEventArgs e)
    {
        // Load the report
        Report report = new Report();
        string reportPath = Path.Combine(Directory.GetCurrentDirectory(), "Assets", "BooksReport.frx");

        report.Load(reportPath);

        // Get the data from entity framework
        List<Book> data = GetDataFromEntityFramework();

        // Convert the objects to DataTable
        DataTable dataTable = new DataTable();
        dataTable.Columns.Add("BookId", typeof(int));
        dataTable.Columns.Add("Isbn", typeof(string));
        dataTable.Columns.Add("Title", typeof(string));
        dataTable.Columns.Add("Author", typeof(string));
        dataTable.Columns.Add("Available", typeof(bool));

        foreach (var book in data)
        {
            dataTable.Rows.Add(book.BookId, book.Isbn, book.Title, book.Author, book.Available);
        }

        // Associate the data with the dictionary
        report.RegisterData(dataTable, "Books");

        // Enable the data source
        var dataSource = report.GetDataSource("Books");
        if (dataSource != null)
        {
            dataSource.Enabled = true;
        }
        else
        {
            MessageBox.Show("DataSource 'Books' not found in the report.");
            return;
        }

        // Prepare the report
        report.Prepare();

        // Export the report to PDF
        PDFSimpleExport export = new PDFSimpleExport();
        using (MemoryStream ms = new MemoryStream())
        {
            report.Export(export, ms);

            // Create a temporary file with .pdf extension
            string tempFilePath = Path.Combine(Path.GetTempPath(), Guid.NewGuid().ToString() + ".pdf");
            File.WriteAllBytes(tempFilePath, ms.ToArray());

            // Attempt to open the temporary PDF file with the default application
            try
            {
                Process.Start(new ProcessStartInfo
                {
                    FileName = tempFilePath,
                    UseShellExecute = true
                });
            }
            catch (Exception ex)
            {
                MessageBox.Show($"Error opening PDF file: {ex.Message}");
            }
        }


    }

    private List<Book> GetDataFromEntityFramework()
    {
        using (var context = new MyDbContext())
        {
            return context.Books.ToList();
        }
    }
Conclusion
By following these steps, you can easily create and display reports in your WPF application using .NET 8 and Entity Framework. This approach leverages community-supported tools and provides a cost-effective solution to your reporting needs. Feel free to enhance this process further by customizing the viewer or exploring additional export options.
I hope this guide helps you implement reporting in your WPF applications seamlessly.